

Orthotic care and fitting instructions
Videos and step-by-step photo guides for putting on and looking after your NovitaTech orthoses.
Your orthotist will show you how to put on your orthosis at your fitting. Use these guides as a reminder at home. Jump to your device:
- Solid or hinged ankle-foot orthosis (SAFO / HAFO)
- Custom resting AFO and knee splint
- Supramalleolar orthosis (SMAFO)
- Carbon fibre AFO and foot orthosis
- Custom foot orthosis or UCBL
If your orthosis rubs, causes discomfort or no longer fits, call our Orthotics & Prosthetics team on (08) 8243 8261 or email [email protected]. Back to Orthotics.
Solid or hinged ankle-foot orthosis (SAFO / HAFO)
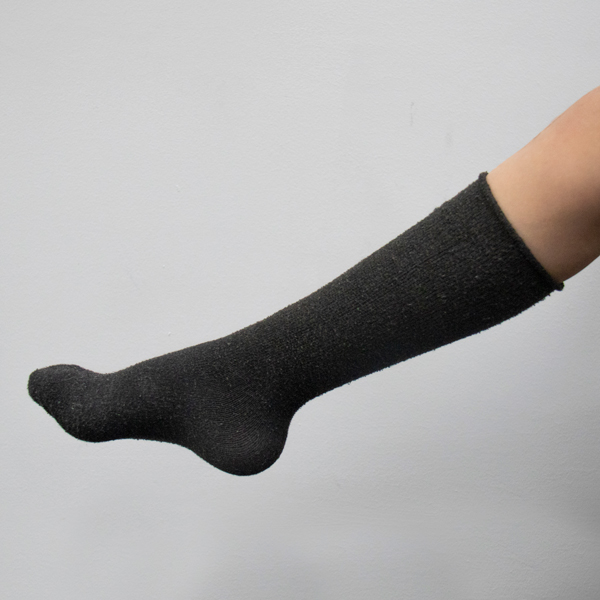
Step 1: Wear long socks - smooth out any wrinkles.
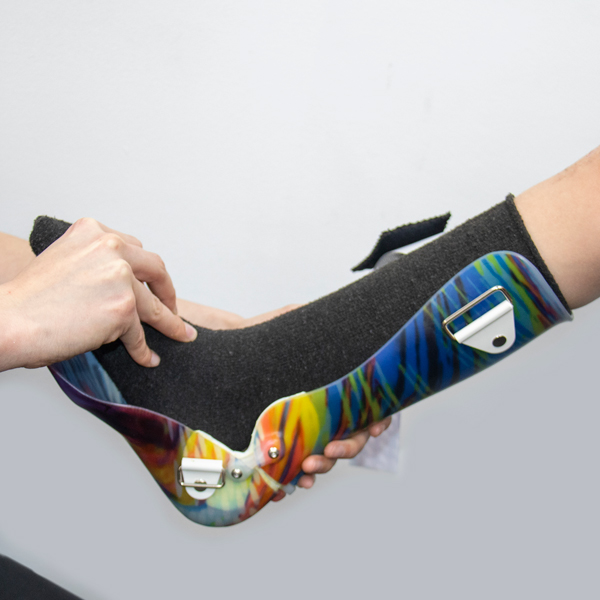
Step 2: Hold foot with toes pointing up in the air and slide into brace aiming the heel towards the heel section in the AFO.
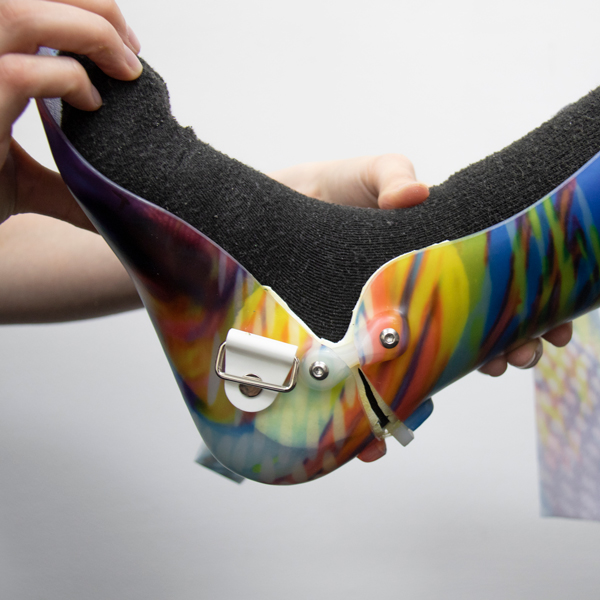
Step 3: Make sure heel is all the way back.
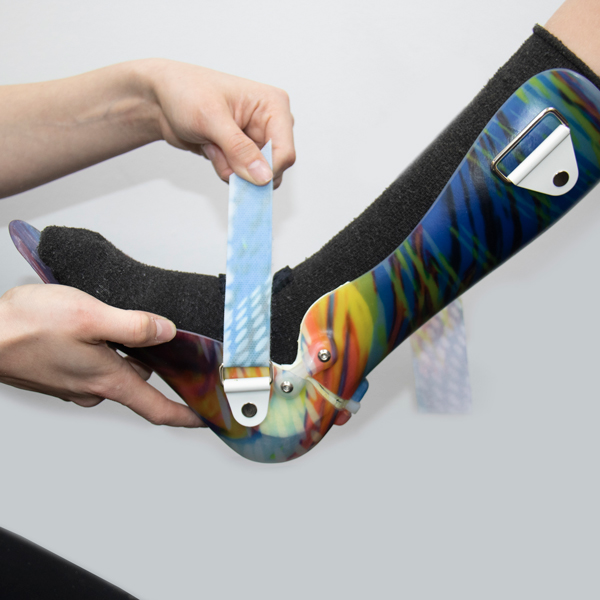
Step 4: Fasten ankle strap first to help lock the heel in place.
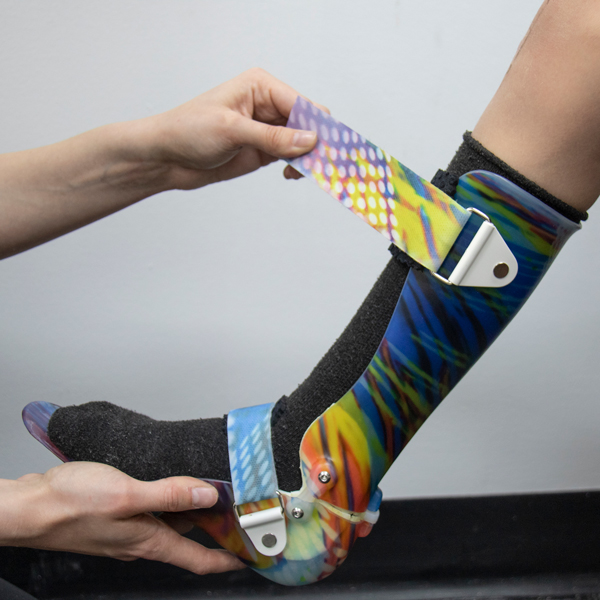
Step 5: Fasten calf strap next and then any other straps.
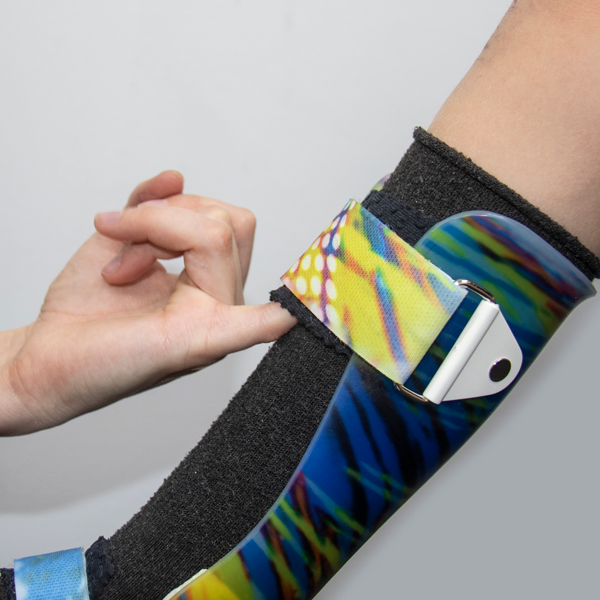
Step 6: Make sure there’s room to wriggle your little finger under straps.
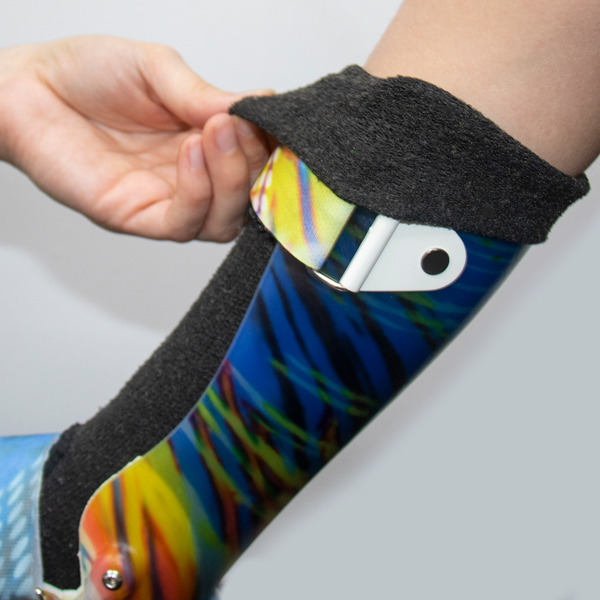
Step 7: Fold socks down over the top strap for extra comfort and to stop socks from sliding down.
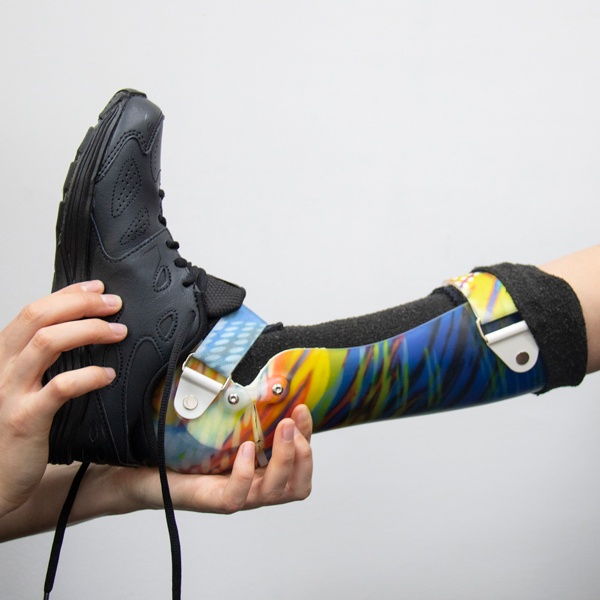
Step 8: Wriggle shoe over the AFO and fasten firmly to keep AFO in place.
Custom resting AFO and knee splint
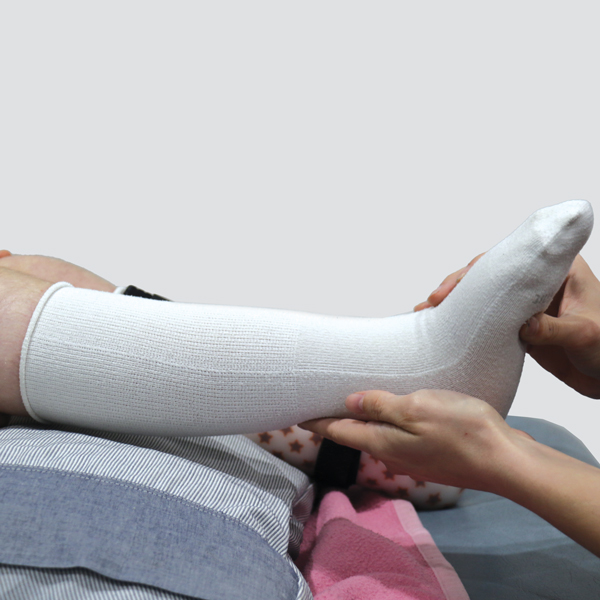
Step 1: Wear a long cotton sock - check for no wrinkles.
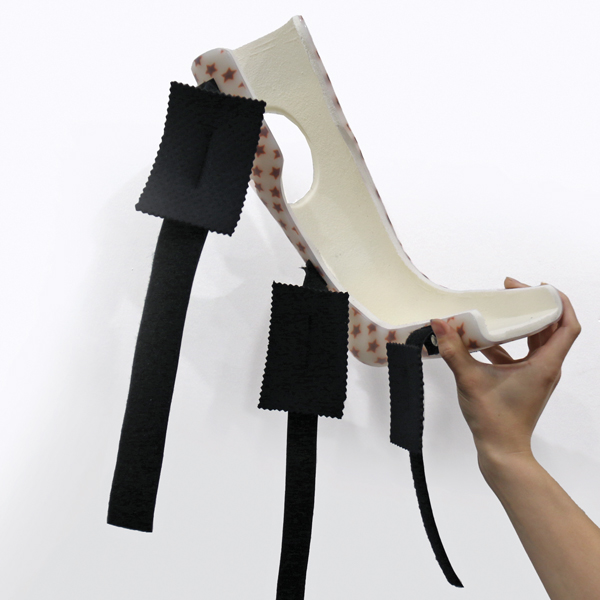
Step 2: Undo all straps on the night splint.
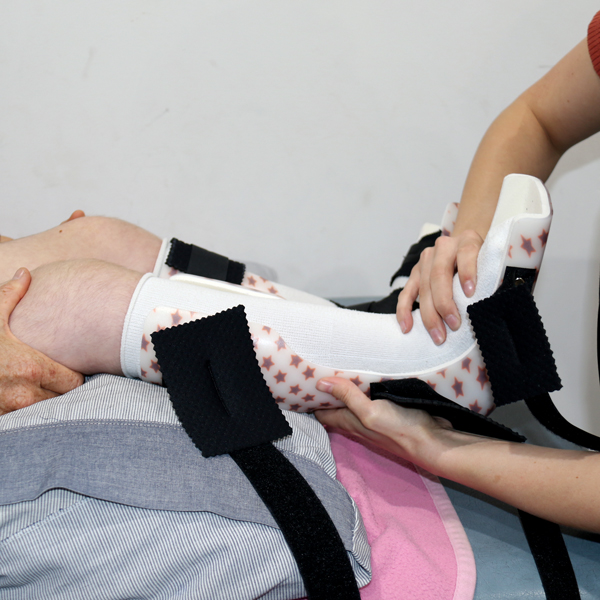
Step 3: Slide foot in and make sure heel is at the back.
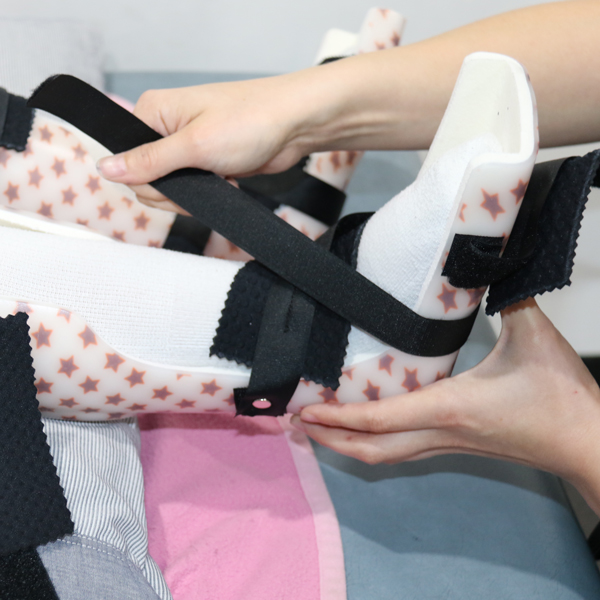
Step 4: Do up ankle strap - it is a figure 8. It goes across the ankle, under the foot and attaches on the other side of the ankle to where you started.
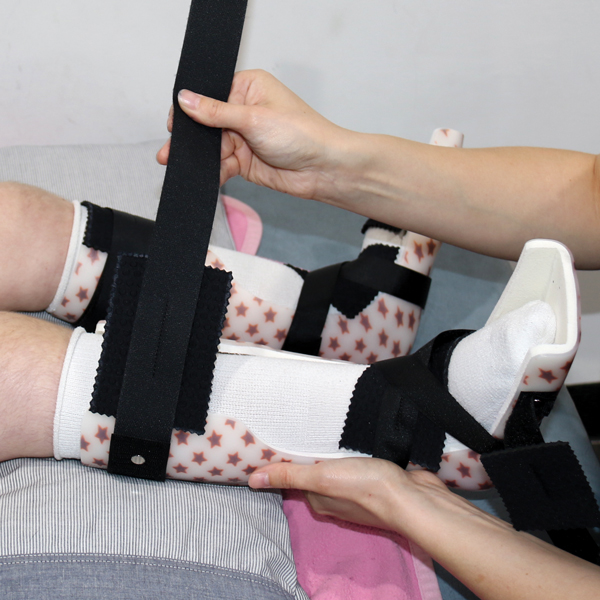
Step 5: Do up calf and foot straps.
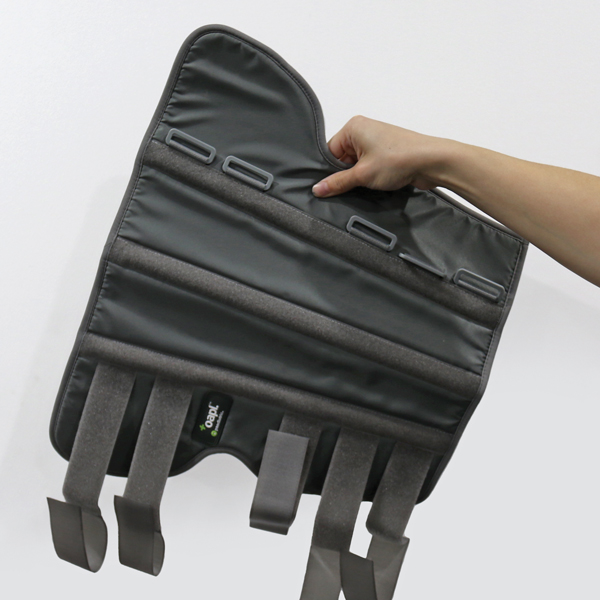
Step 6: If you have knee braces as well, undo all the straps on them.
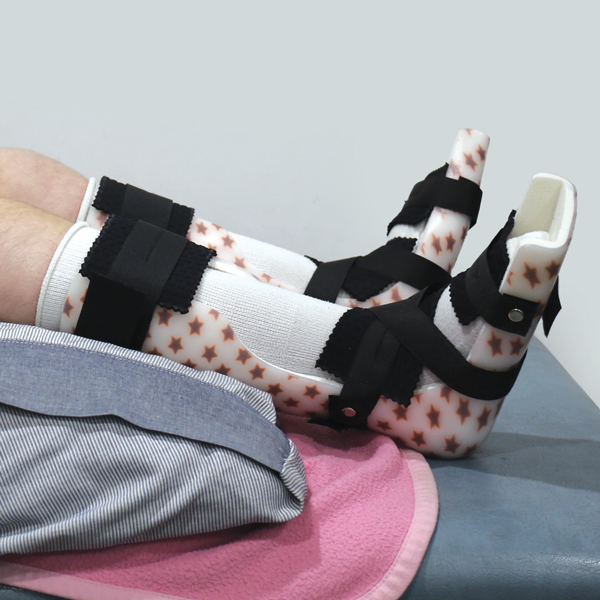
Step 7: Keep your leg straight (easiest on a couch or bed).
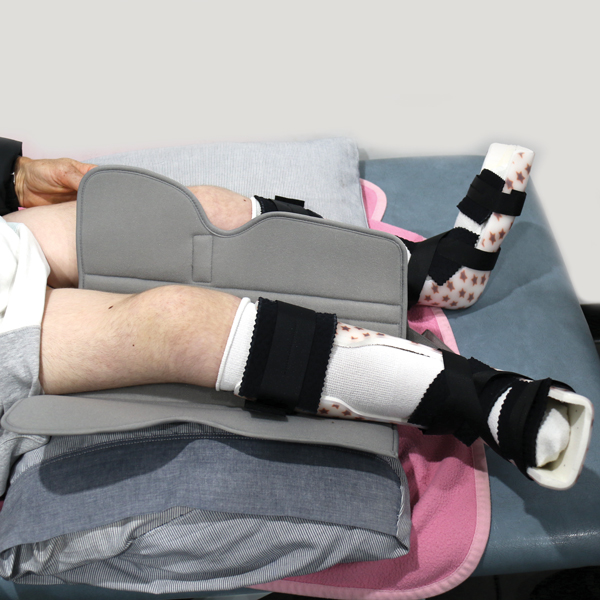
Step 8: Lay it flat underneath your knee. Widest part of the brace should be under your thigh.
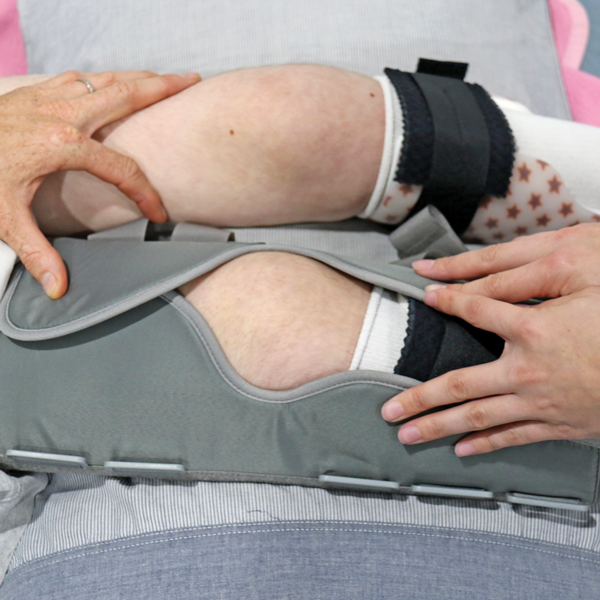
Step 9: Wrap the brace over your leg, making sure knee is visible in the knee hole.
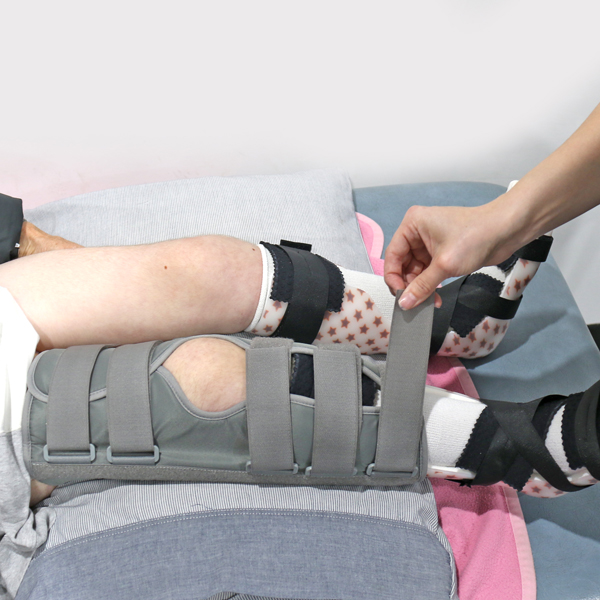
Step 10: Do all straps up firmly so that knee remains flat.
Supramalleolar orthosis (SMAFO)
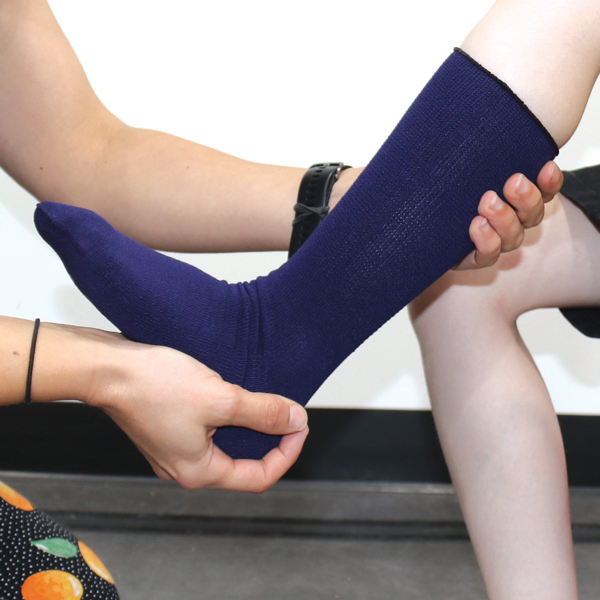
Step 1: Wear ankle-high or longer socks - check for no wrinkles.
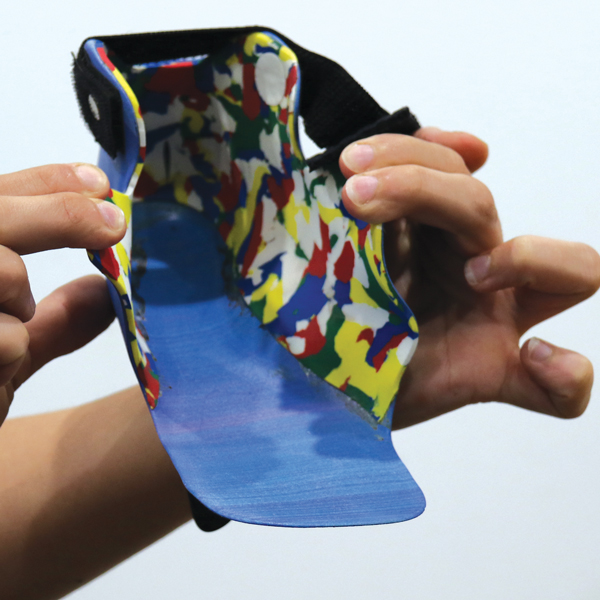
Step 2: Open the orthotic carefully at the wings.
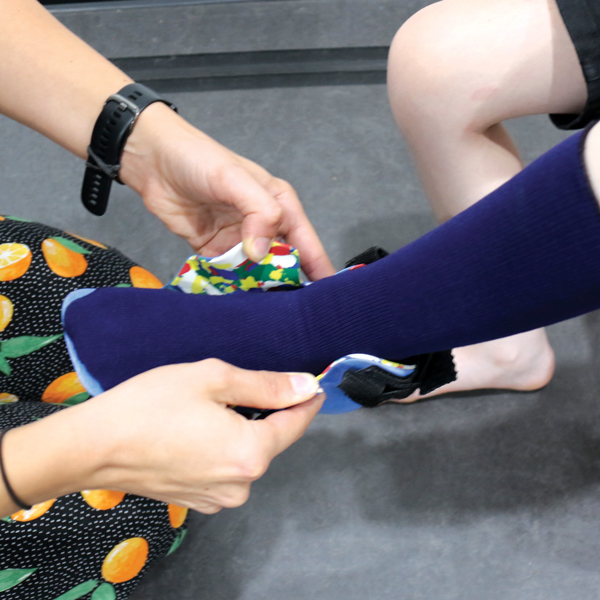
Step 3: Slide the foot down into the brace. Make sure heel is all the way back.
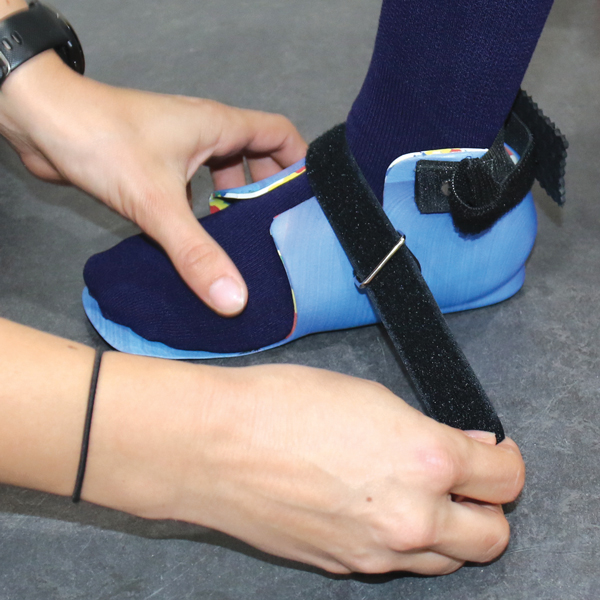
Step 4: Do up the instep strap (the one with the buckle) first.
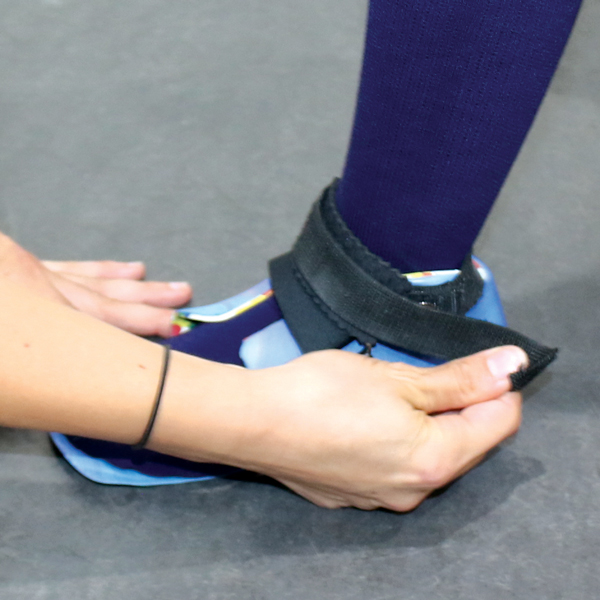
Step 5: Do up any other straps such as ankle and forefoot straps.
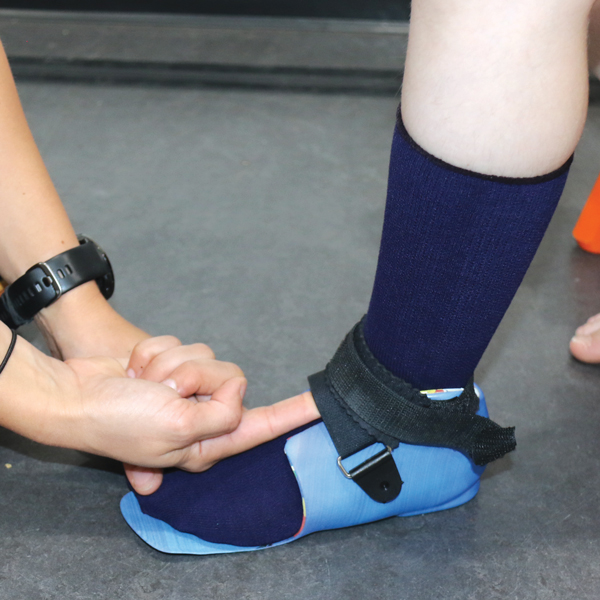
Step 6: Make sure there’s room to wiggle your little finger under straps.
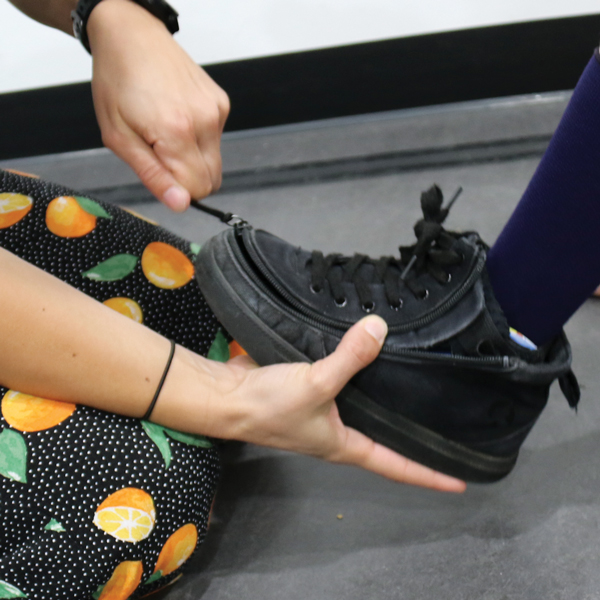
Step 7: Wiggle shoe on and fasten firmly to keep AFO in place.
Carbon fibre AFO and foot orthosis
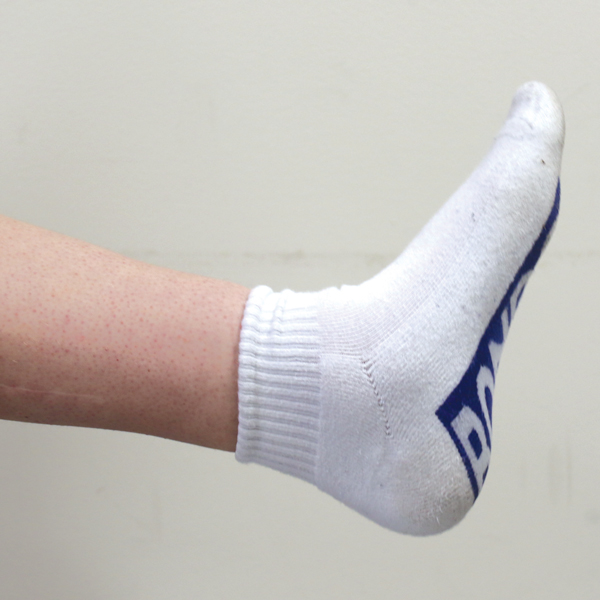
Step 1: Can be worn with short socks or if wearing long socks, check for no wrinkles.
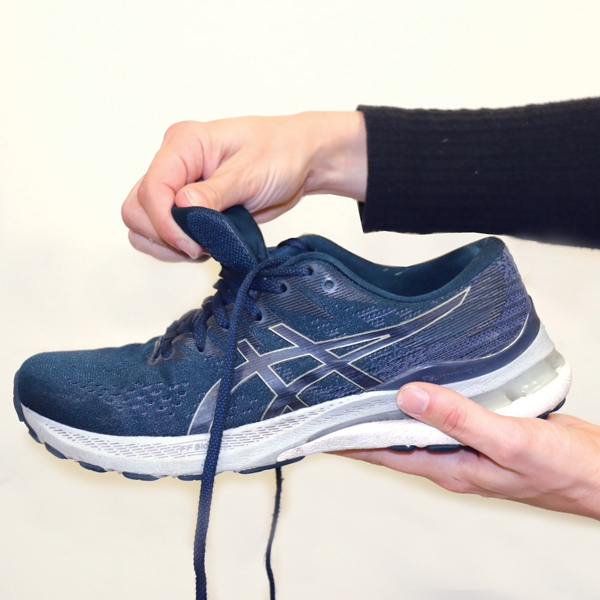
Step 2: Loosen laces. Remove inner liner from shoes.
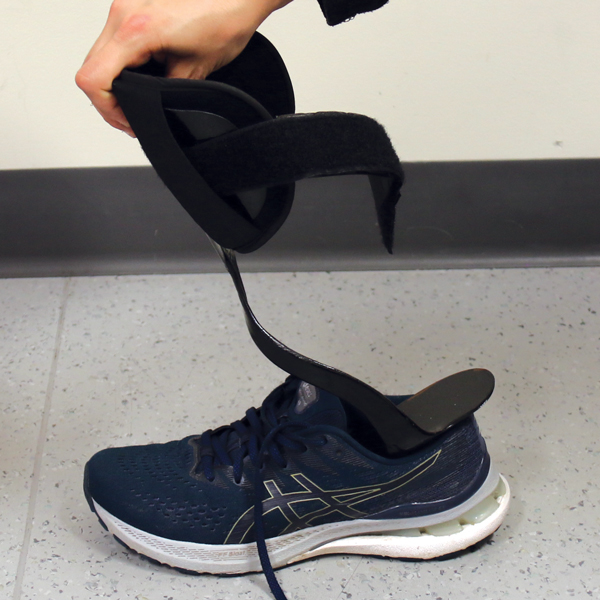
Step 3: Slide black carbon fibre AFO into shoe. Pull it back to make sure it is sitting at the heel.
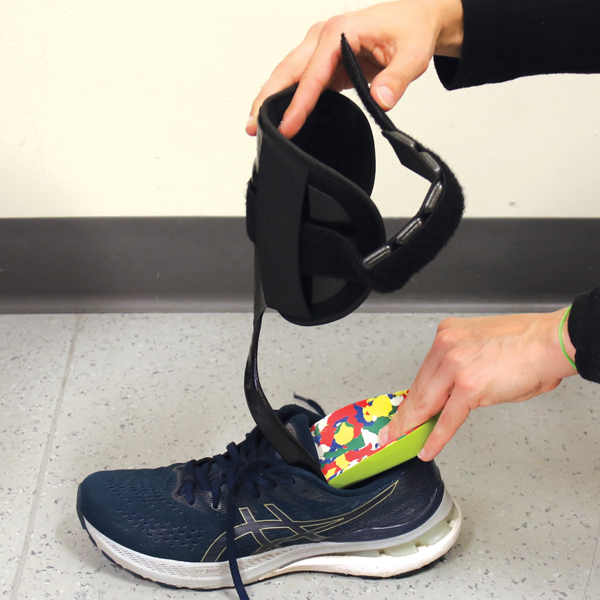
Step 4: Slide the foot orthotic on top of this.
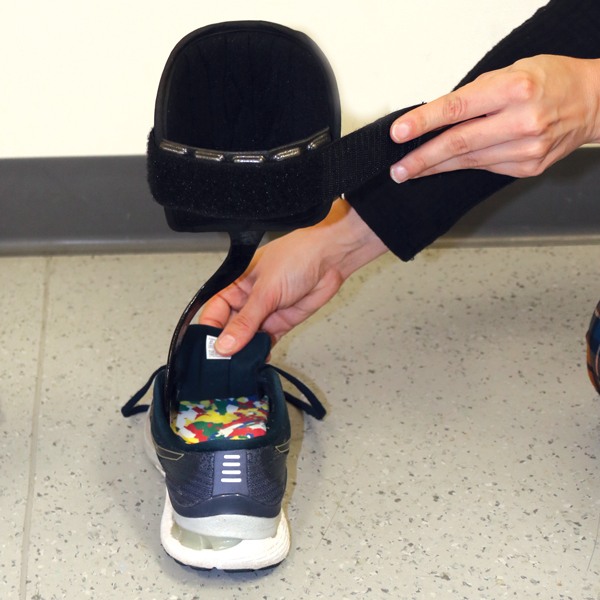
Step 5: Make sure both are flat - if not start again.
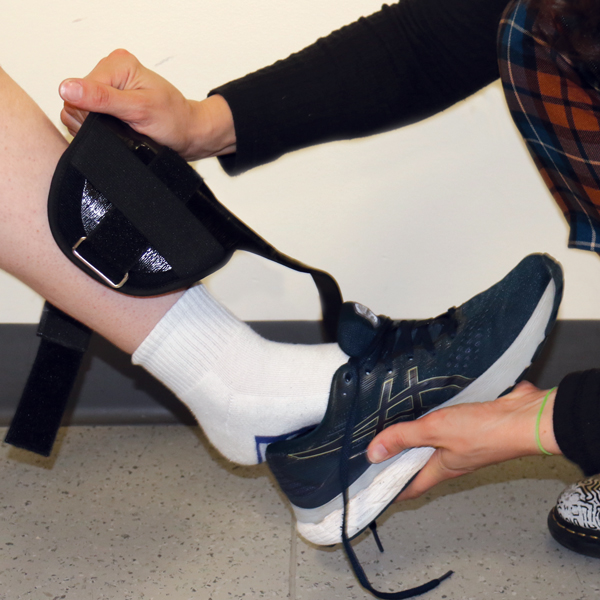
Step 6: Slide shoe on as normal.
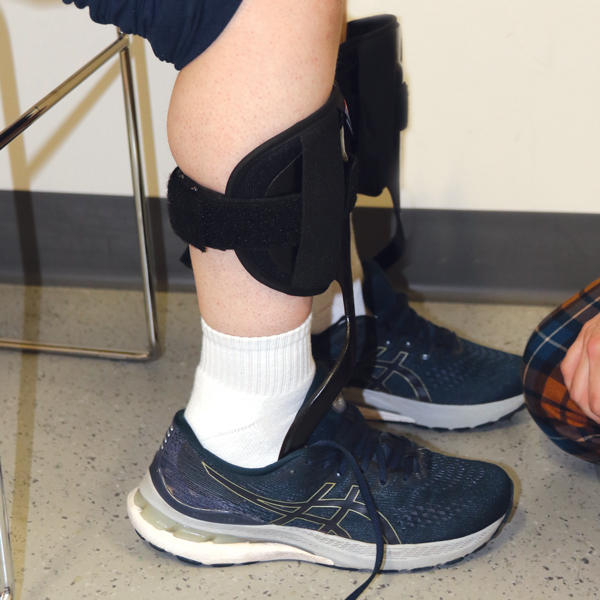
Step 7: Have foot flat on the ground and leg at 90 degrees to the floor to fasten straps of the carbon fibre AFO.
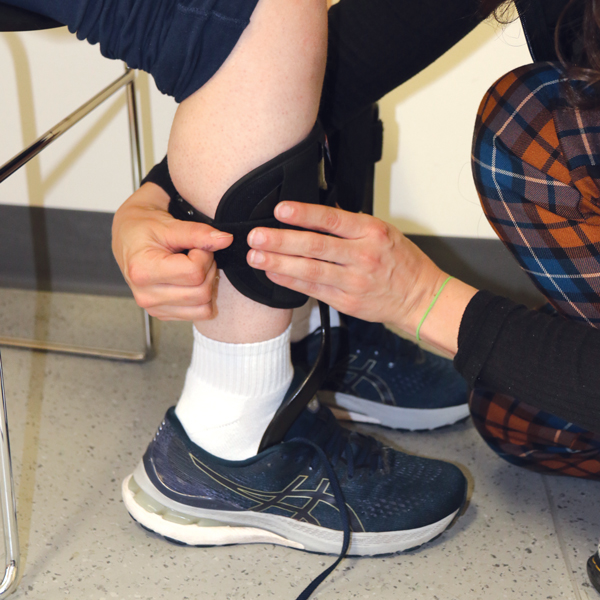
Step 8: Fasten AFO strap around the calf then move down the leg to fasten any other straps.
Custom foot orthosis or UCBL
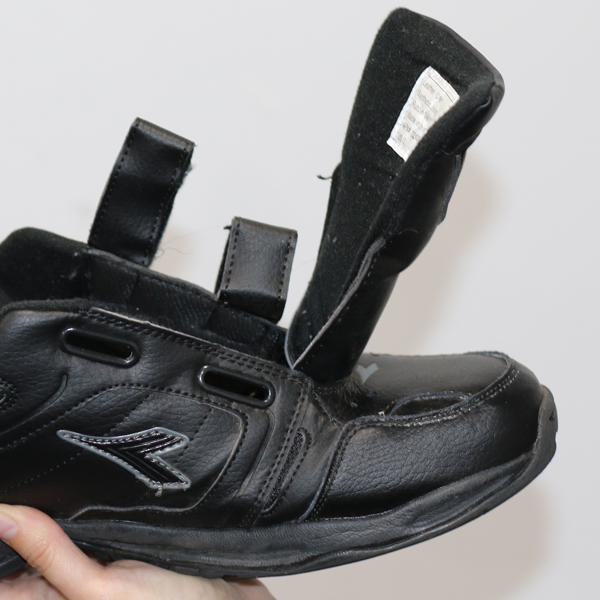
Step 1: Loosen laces or straps.
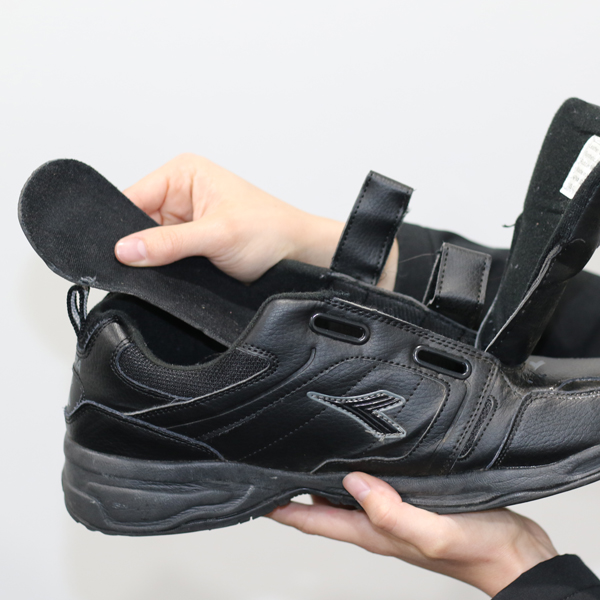
Step 2: Remove inner liner of shoe.
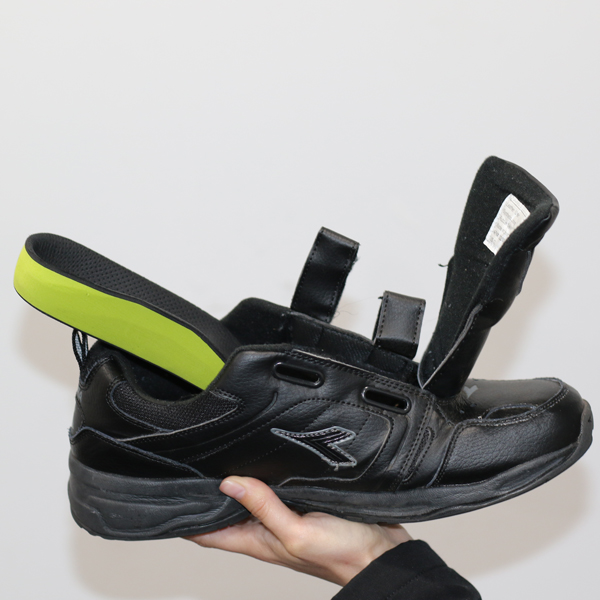
Step 3: Put UCBL (plastic) or foot orthotic (foam) insert into shoes.
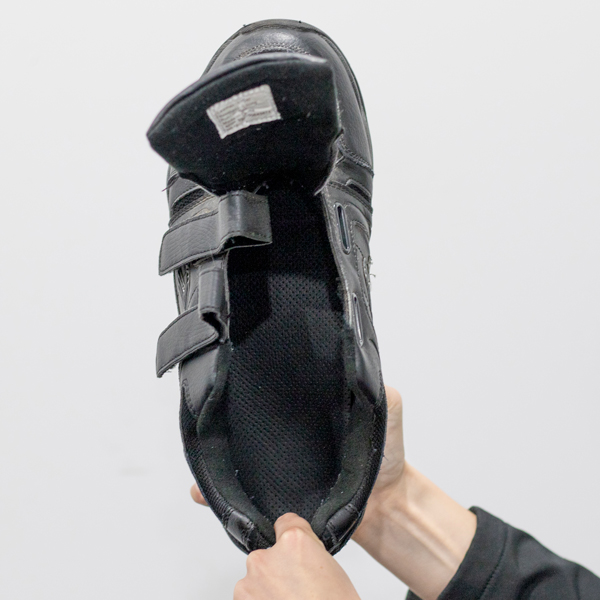
Step 4: Check it is sitting flat and not curled up.
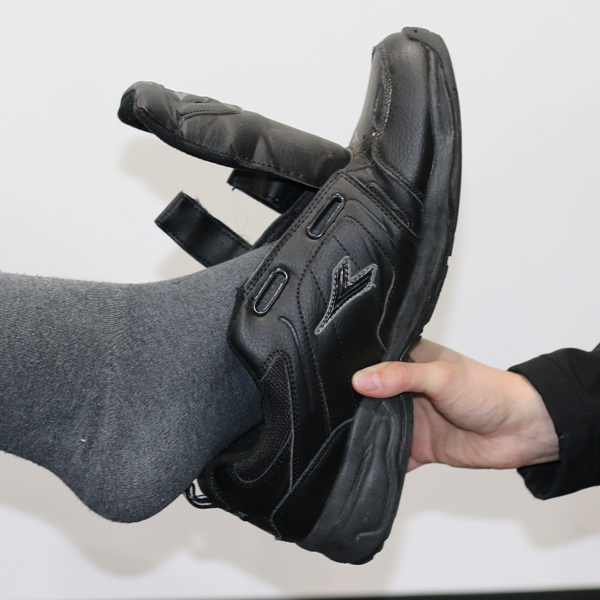
Step 5: Slide your shoe on as normal.
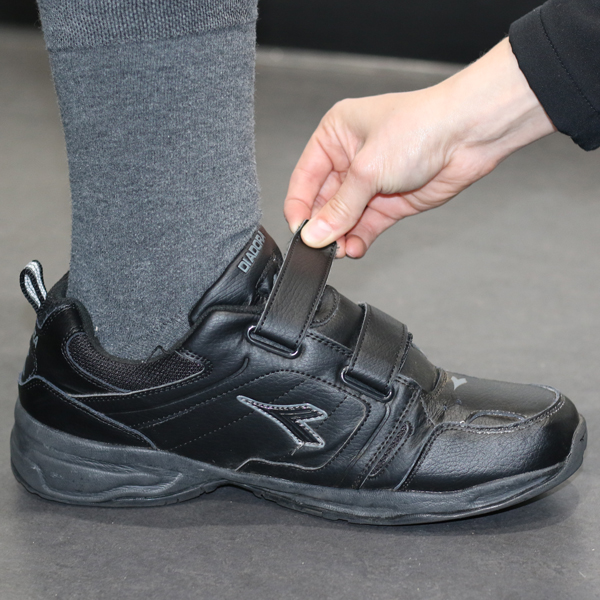
Step 6: Fasten laces/straps tightly.
Need help with your orthosis?
Send us a message and our Orthotics & Prosthetics team will be in touch.